


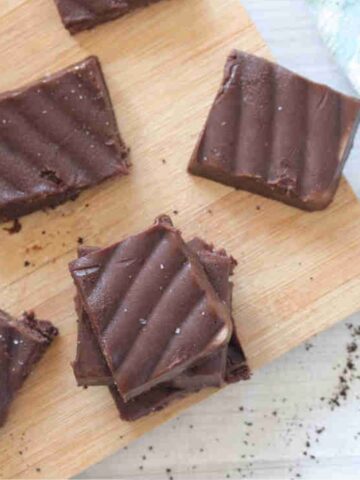
Skip the store-bought cake mix and make these Dairy-Free Cake Pops from scratch. Soft vanilla cake is rolled into bite-sized balls and coated in rich dairy-free chocolate for an easy, kid-approved treat that’s perfect for parties and cute school events.

"Wow, these dairy-free cake pops were a huge hit. It's nice knowing that I am serving something the family that is really healthy!" - Gwen
A Quick Look At The Recipe
- ⏲️Ready In: 75 Minutes
- 👪Serves: 12
- 🍽 Calories and Protein: 168 kcals and 4 grams of protein
- 📋Main Ingredients: Oat flour, almond flour, almond butter, maple syrup, and almond milk.
- 📖 Dietary Notes: Dairy-free and gluten-free
- ⭐ Why You'll Love It: A healthy way to curb your sweet tooth cravings!
SUMMARIZE & SAVE THIS CONTENT ON
This dairy-free cake pops recipe is an easy, allergy-friendly twist on a classic treat, perfect for birthdays, school parties, or weekend baking with kids. They’re simple to customize with different coatings and sprinkles, and using a quick drizzle of dairy-free chocolate glaze makes decorating even easier.
Honestly, the best way to make cake pops is to set out a few toppings and let the kids decorate their own (less perfection, more fun). These bite-sized treats are just enough to satisfy a sweet craving without going overboard (unless you refuse to share, which is totally me), and while you're at it, try these birthday cake protein balls, too.
Jump To
💭Why You’ll Love The Recipe
Healthy: This recipe is an allergy-friendly, healthier version of the normal box cake version. Made from scratch and coated in vegan chocolate, they’re dairy-free, gluten-free, and simple to make.
Minimally sweetened: Outside of the chocolate chips, the cake pops are primarily sweetened with maple syrup and a hint of stevia (optional).
Fun: There are so many ways to decorate these cake balls that you’ll never run out of ideas! Kids love getting into the kitchen and helping with this.
Ingredients You'll Need

You don't need much to make these vegan cake pops. In fact, if you have a well-stocked gluten-free pantry essentials, you'll have everything you need!
- Oat flour: If making these for someone who is celiac, make sure to double-check that the oat flour is completely gluten-free. And when in doubt, use gluten-free oats and grind them into flour yourself. Learn more about types of gluten-free flour.
- Almond flour: This makes each cake ball light but filling. Learn the difference between almond flour and ground almonds, though, and use almond flour as it’s thinner and won’t leave a chewy texture.
- Almond Milk: We use homemade hemp milk the most, but regular almond or oat milk is great, too.
- Coconut milk: Make sure to use the thick, white part in the can and drain the excess water for the most indulgent flavor. Learn more about the types of different types of coconut milk.
- Powdered stevia: Used to sweeten the cake pops. Know that any sugar can work here, but if using a typical sugar, you'll need a bit more than listed.
- Dairy-free chocolate chips: We find that Enjoy Life Chocolate Chips are the best for coating the cake pops.
See the recipe card for full information on ingredients and quantities.
Flavor Variations
White chocolate: If you can find a high-quality, dairy-free white chocolate, it's a fun twist to change up the aesthetics on the balls.
Extract: Adding almond extract, rum extract, or lemon extract if using white chocolate brings a new flavor to the gluten and dairy-free cake pops.
Drizzle and decorating: Sprinkle on chunky sugar, coconut, crushed nuts, or sprinkles to make the cake pops unique. Or, make them extra indulgent with a drizzle of caramel sauce with coconut milk.
How To Make Dairy-Free Cake Pops

Step 1: Mix together the oat flour, baking powder, and almond flour.

Step 2: In a smaller bowl, beat together the almond butter and maple syrup. Stir in the stevia and vanilla extract.

Step 3: Pour the wet ingredients into the dry ingredients and mix until combined.

- Step 4: Portion into cupcake molds and bake.

- Step 5: Once cooled, crumble the cupcakes into a bowl and add the coconut milk and powdered stevia.

- Step 6: Using your hands, roll the dough into balls. Place a stick into each cake ball and set them on a parchment paper-lined baking sheet and into the freezer.

Step 7: Melt the chocolate sauce and begin to dip the balls.

Step 8: Sprinkle on any toppings and let them set in the freezer.
Expert Tips To Make It
If you don’t have vanilla stevia, simply use a total of 1 teaspoon vanilla + ½ packet of stevia.
Make sure to use coconut milk from a can, not a carton. You don’t want a full liquid but instead the coconut cream. This makes the cake pops have a better texture.
If your cake balls are falling apart as you shape them, try chilling the dough briefly. This helps them hold together.
Some people chill the balls before they place the sticks in, and that works too. If you're placing the sticks first, compress the ball around the stick a bit so that it stays in.
Dairy-free chocolate chips work best for melting, and heating them with coconut oil helps thin them out so that the balls are easier to dip. If your chocolate is too thick, the cake pops will be pulled off the stick.
How To Store Them
Once they’ve set in the freezer, store your cake pops in the fridge. They stay fresh like this for 3-4 days. You can also just prep the balls in advance and coat them with chocolate just before serving.
You can store them for longer in the freezer by placing them in an airtight container, and they’ll last 2-3 months. When you need them, let them thaw overnight in the fridge.
The dairy-free cake pops can be served chilled, but taste best after sitting at room temperature for 10 minutes.
Dairy-Free Cake Pops FAQs
They don't need to be frozen before dipping, but they do need to be extremely cold, or they will crumble- especially being gluten-free. Freezing them is normally the easiest way to dip them.
The cake balls themselves are pretty delicate, so it can be hard to get the cake pop stick in. A few ways to get the stick to hold in the cake pops are to make sure that the balls are hard from the fridge or freezer, and not soft. Likewise, dipping the stick in honey or a bit of melted chocolate before pressing it into the ball will help them hold together and look more like traditional cake pops.
Keeping the balls from falling apart is a balance of ensuring there's enough liquid added to the cooked and crumbled cake for it to press together easily. From there, letting the dough chill before shaping it can help hold it together.
Yes, cake pops can be made in advance. Either prep the cake balls and store them in the fridge for a day or two before dipping them in chocolate, or an hour or so before you need them. Or store fully made cake pops in the fridge, covered in plastic wrap, for up to 2 hours.

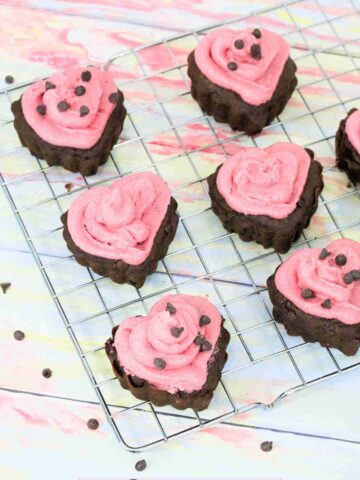
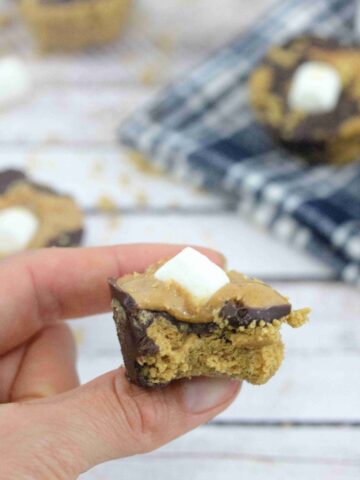
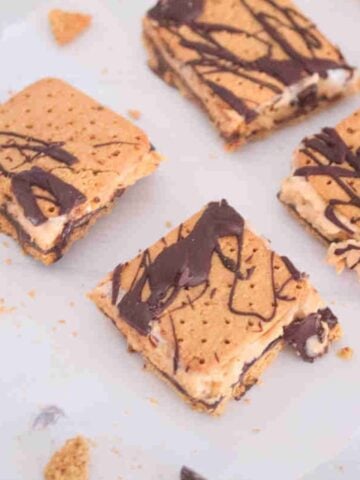
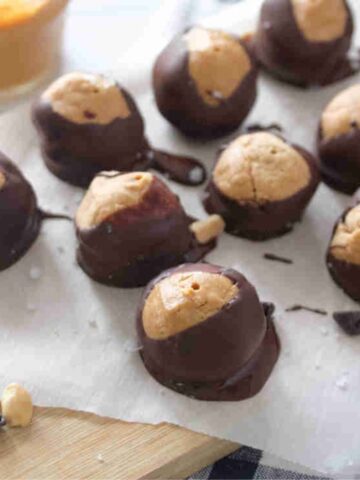
More Healthy Dessert Recipes You'll Love


If you tried this Dairy-Free Cake Pop Recipe or any other recipe on my blog, please leave a 🌟 star rating and let me know how it goes!

Dairy-Free Gluten-Free Cake Pops
Video
Equipment
- Mixing Bowls
- 12 Cake pop sticks
Ingredients
- 1 cup oat flour
- ½ cup almond flour
- 1 teaspoon baking powder
- ¼ cup Almond butter
- ⅓ cup pure maple syrup
- 1 teaspoon liquid vanilla stevia optional, see notes
- ¼ teaspoon Vanilla extract
- ¼ cup almond milk
- 2 tablespoons coconut milk from a can, see notes in blog post
- ½ packet stevia
- ¼ cup enjoy life chocolate chips dairy-free
- ⅛ cup coconut oil
Instructions
Make the cupcakes
- Pre-heat the oven to 350F.
- In a large bowl, mix the oat and almond flour with the baking powder.
- In a smaller bowl, beat together the almond butter and maple syrup so that you can mix them together. Stir in the vanilla stevia and vanilla extract to this bowl.
- Mix the wet ingredients into the flour until combined.
- Slowly add in the almond milk and mix to combine.
- Prep a muffin tin with silicone molds and portion the batter into eight muffin cups.
- Bake for 21-23 minutes before removing them from the oven and letting them cool in the pan.
Prep the balls
- Once cooled, crumble the muffins into a large bowl and break them apart with your hands.
- In a smaller bowl, whisk together the coconut milk and powdered stevia.
- Add the coconut milk to the crumbled cupcakes and mix until moist.
- Using your hands, roll the dough into balls. Place a stick into each cake ball pinch around the base so that they stay together and set them on a parchment paper-lined baking sheet.
- Place the balls into the freezer for thirty minutes. While the balls are setting, melt the chocolate chips and coconut in a small pot on very low heat. Mix well.
Coat the balls
- Once melted dip the balls into the melted chocolate making sure to get some onto the stick and place them back on the tray. Sprinkle them with any toppings you want and into the freezer for another thirty minutes for the chocolate to harden.
- Let them chill in the fridge or come to room temperature before serving.
Notes
Disclaimer:
Nutrition values are estimates only, using online calculators. Please verify using your own data"
Nutrition


Gwen says
Wow, these dairy-free cake pops were a huge hit. It's nice knowing that I am serving something the family that is really healthy!
fitasamamabear says
Yay!
Shannon says
I can't believe I have never had a cake ball. Gasp. But these look awesome! High in protein and low in sugar is my kind of treat. I'm going to have to put this on the make list.
fitasamamabear says
They turned out really yummy considering they were a screw up initially haha. Make them and let me know! Keep in mind they're not fluffy like cake but more dense and yummy.. and you can pop them in your mouth which makes them even better lol
Kelsey says
OH MY STARS!!! I've made super un-healthy cake balls before and they were AMAZING, but I just can't make them again knowing how bad all the ingredients were for me and my family! Thank you for this healthier option! Now I can give them another whirl!
fitasamamabear says
Aw this made my day! I hope you enjoy them! They were definitely an "accidental" recipe haha but they're yummy! Just an fyi that's they're more dense than a regular cake/cupcake ball. My family adored them though, I hope yours does too!
Raia Todd says
These sound like something my kids would absolutely love! And I love that there's only natural sweeteners in them!
fitasamamabear says
Mine definitely loved them! And I'm all about natural sweeteners are I'm not quite yet ready to give them sugar!